Design signature areas and signing workflows
Design Signature Area
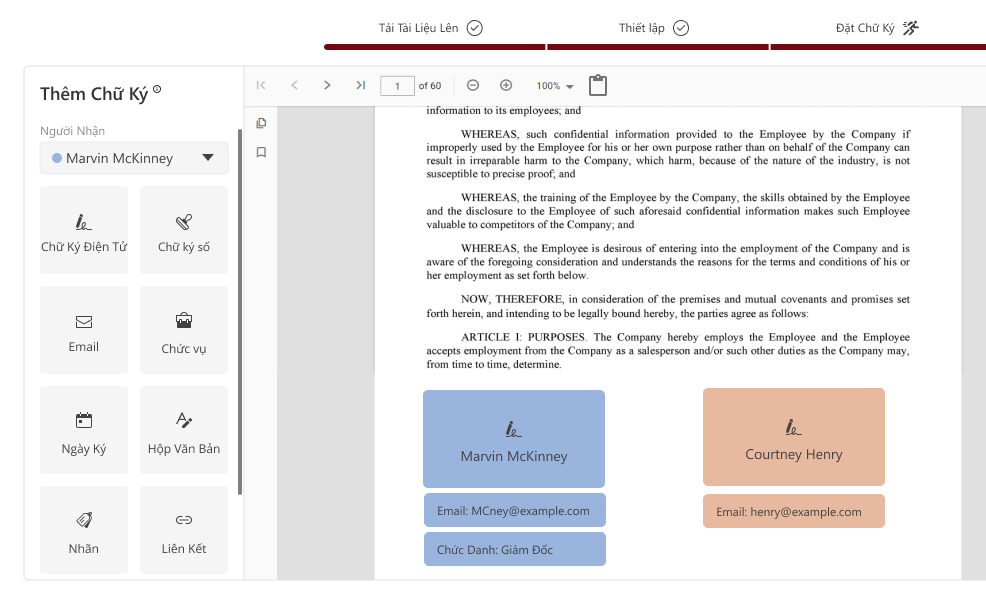
At the Create Signature step, the system will display the following:
- List of users added in the General Setup tab
- Document files uploaded by users for signing
- General information about the document for signing
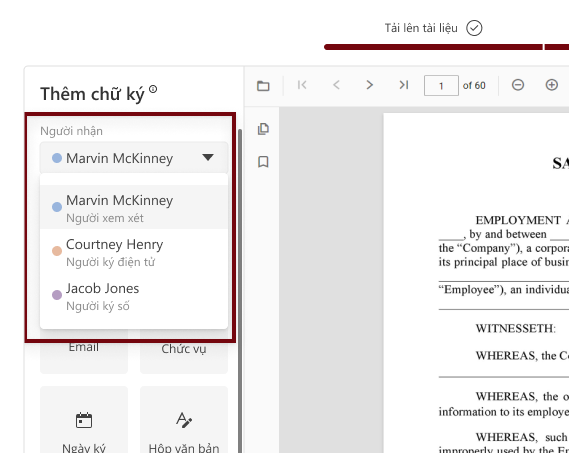
Beside, each user in the signing list will be assigned a unique color code by the system to help easily distinguish when dragging and dropping the corresponding signing areas on the document.
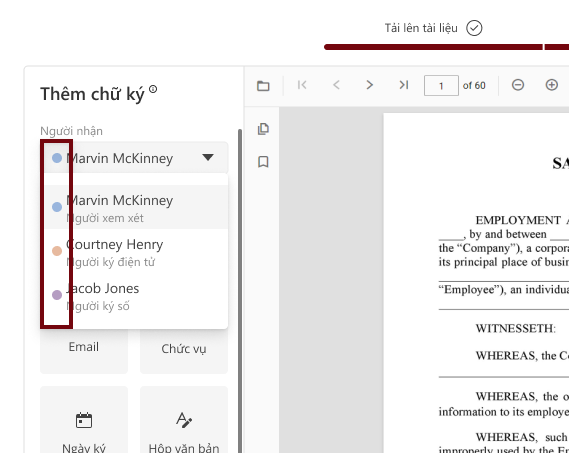
The user selects the signer to work with, then drags and drops the token to the desired position on the document.
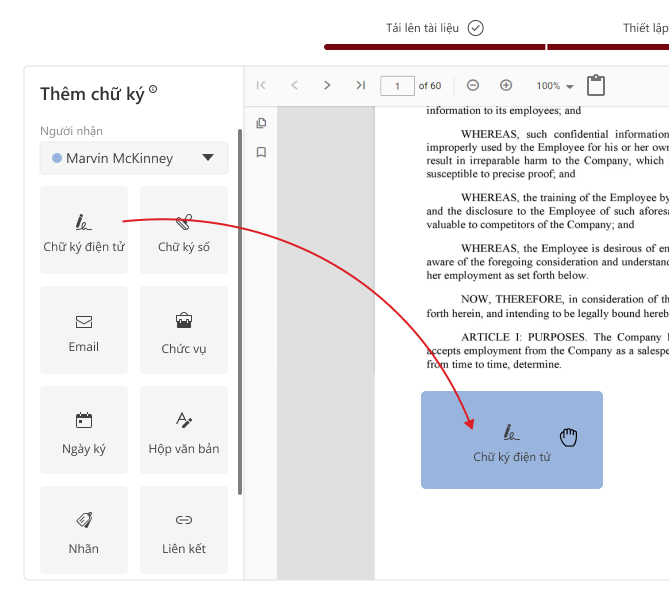
For Reviewers, the system will display 4 types of tokens:
- Position
- Text box
- Label
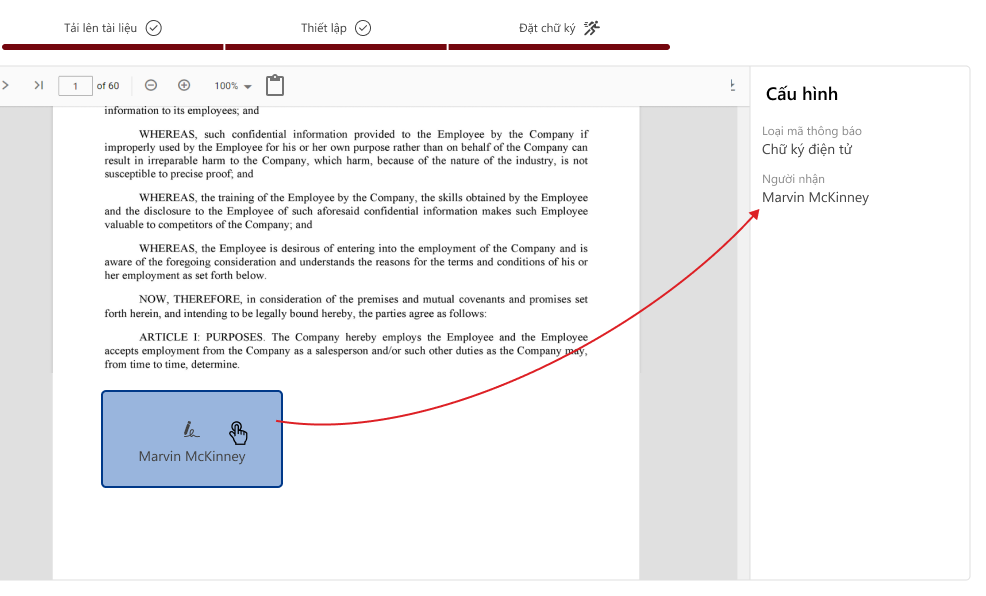
For Digital Signers, only one type of token is displayed: Digital Signer. The user clicks on the desired token, then drags and drops it to the signing position on the document.
After dragging the token onto the document, the user can edit it by clicking on the token. In the Settings section, the user can change the displayed information as needed. After editing, click outside the working area for the system to automatically save the changes.
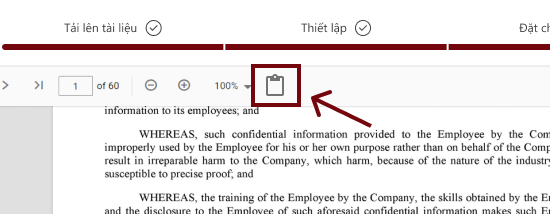
Note: Users can copy tokens already added to the document and paste them onto other pages as follows:
- Hold Ctrl and click to select the tokens to copy.
- Navigate to the desired page, then press Paste or click the paste icon to insert the tokens into the new page.
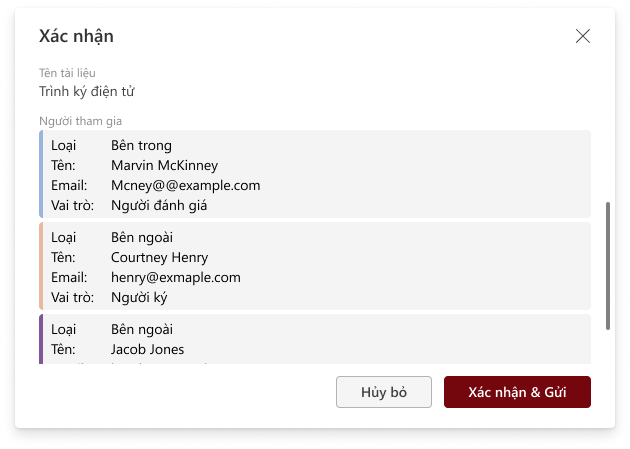
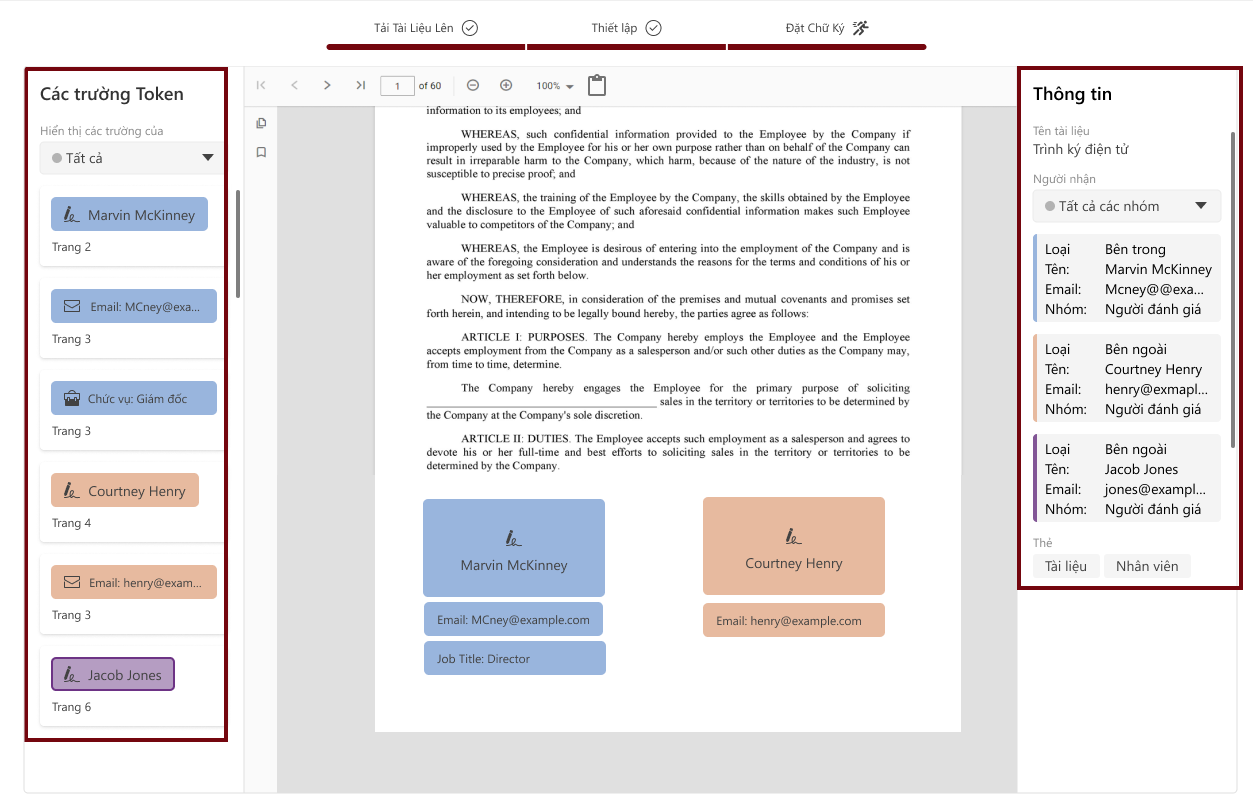
Preview and Complete
The user clicks "Preview" to review all information, including:
- The list of signers.
- The tokens added to each page of the document. After reviewing, the user can proceed to Complete to finish the signing setup process.
After completing the setup, the user clicks "Finish" to end the signing creation process. The system will display a confirmation dialog. The user clicks "Confirm & Send" to officially complete the electronic signing setup.